Ever nicked your fingertip mid-trim and spent the next three days avoiding doorknobs like they’re cursed? Or worse—snagged your favorite silk blouse on a jagged nail edge you *swore* you filed smooth? You’re not clumsy. You’re just using the wrong technique (and probably the wrong clippers).
In this post, we’ll cut through the fluff (pun absolutely intended) and show you how proper nail trimming isn’t just about aesthetics—it’s a non-negotiable for nail health, infection prevention, and long-term strength. Drawing from 8 years as a licensed nail technician and founder of a clinical-grade nail tool brand, I’ll walk you through:
- Why most people trim nails all wrong—and the 3-second habit that causes ingrown toenails
- How to choose clippers that actually cut cleanly (hint: it’s not about price)
- The exact angle, sequence, and post-trim care routine dermatologists swear by
Table of Contents
- Why Proper Nail Trimming Matters More Than You Think
- Step-by-Step Guide to Proper Nail Trimming
- 5 Best Practices That Keep Nails Strong & Splinter-Free
- Real-World Case Study: From Chronic Ingrowns to Salon-Ready Nails
- FAQs About Proper Nail Trimming
Key Takeaways
- Trim fingernails straight across with slight rounding at the corners; never cut into the sides.
- Use sharp, stainless steel clippers—dull blades crush keratin, causing micro-tears.
- Soak nails before trimming if they’re thick or brittle (but never skip drying completely).
- Improper trimming is a leading cause of paronychia (nail infections), per the American Academy of Dermatology.
- Toenails should be cut straight across—no curves—to prevent ingrown nails.
Why Proper Nail Trimming Matters More Than You Think
Here’s a truth no one tells you: your nail clippers aren’t just grooming tools—they’re precision instruments. And using them wrong is like trying to slice ripe tomatoes with a butter knife. It works… until it doesn’t.
I learned this the hard way. Early in my nail tech career, I treated a client who’d developed recurrent paronychia—an infection of the nail fold—because she’d been “sculpting” her nails into sharp stilettos with cheap, dull clippers from a dollar store. The micro-splinters created entry points for bacteria. After switching to proper technique and quality tools, her infections vanished in 6 weeks.
According to the American Academy of Dermatology (AAD), improper nail trimming contributes to over 40% of common nail disorders, including ingrown nails, onycholysis (nail separation), and fungal entry points. And let’s not forget the aesthetic fallout: ragged edges snag hosiery, weaken polish adhesion, and make natural nails look unkempt—even freshly painted.
Step-by-Step Guide to Proper Nail Trimming
What tools do you actually need?
Forget gimmicks. For proper nail trimming, you need just three things:
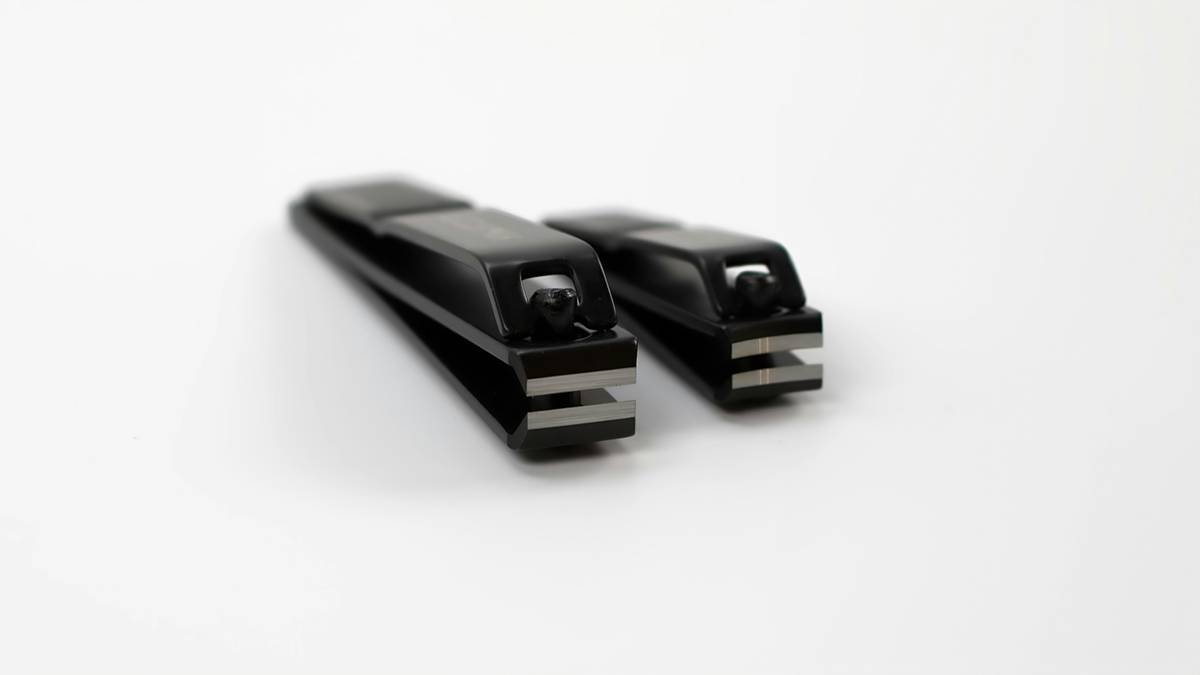
- Stainless steel nail clippers with a sharp, concave cutting edge (more on types below)
- 180-grit glass or crystal nail file (never metal—it frays keratin)
- Cuticle oil or hydrating cream (applied post-trim)
Step 1: Prep the nail (don’t skip this!)
Optimist You: “Just snip and go!”
Grumpy You: “Ugh, fine—but only if I’ve had my matcha.”
Never trim dry, brittle nails straight out of the shower. Wait 10–15 minutes so they’re pliable but not waterlogged. Waterlogged nails bend instead of cut cleanly, increasing fracture risk. If nails are thick (common with age or psoriasis), soak in warm water for 3–5 minutes, then pat completely dry.
Step 2: Choose your clipper type wisely
Not all clippers are created equal:
- Standard jaw clippers: Best for average fingernails. Look for ones with a slight curve matching your nail’s natural arc.
- Toenail clippers: Larger, with straighter jaws and stronger leverage—essential for thicker toenails.
- Nipper-style clippers: Used by pros for hangnails or precise corner cleanup. Avoid for full-length trimming.
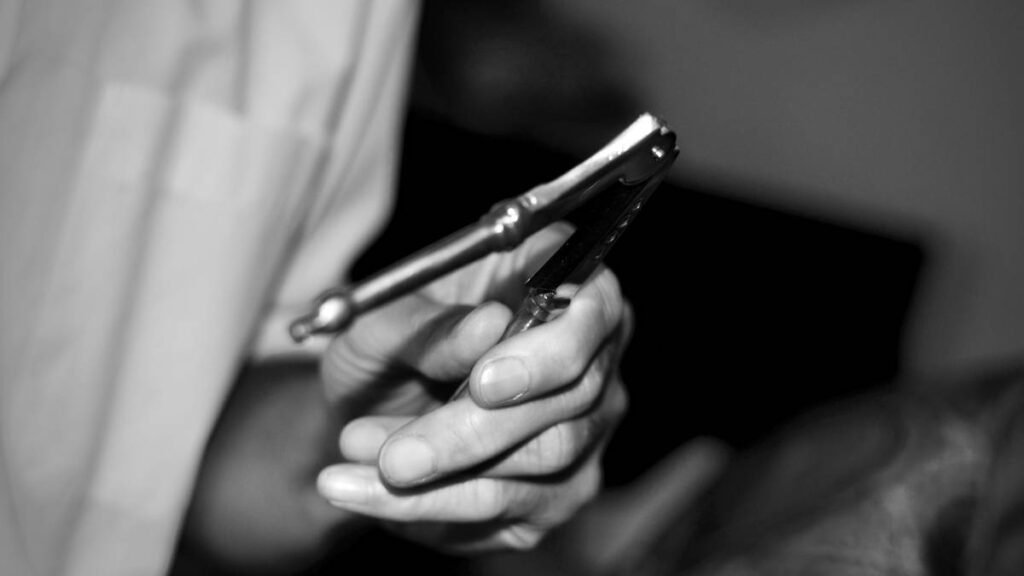
Pro tip: Test sharpness by clipping a single hair. If it cuts cleanly on first try, it’s sharp enough.
Step 3: Trim in one smooth motion
Place the clipper perpendicular to the nail surface. Make a single, firm press—don’t saw or nibble. For fingernails, follow the natural curve but leave corners slightly squared (never round deeply into the sidewall). For toenails, cut dead straight across.
Step 4: File gently—never file back-and-forth
Use your 180-grit file in one direction only, from corner to center. Back-and-forth filing creates micro-fractures that lead to peeling.
Step 5: Hydrate immediately
Apply cuticle oil within 60 seconds of trimming. Nails absorb moisture fastest right after cutting.
5 Best Practices That Keep Nails Strong & Splinter-Free
- Trim weekly—but never more than 1–2 mm at a time. Over-trimming stresses the nail matrix.
- Disinfect clippers after every use. Soak in 70% isopropyl alcohol for 5 minutes to kill fungi/bacteria (CDC recommendation).
- Never cut cuticles. Push them back gently with a wooden orange stick instead. Cutting invites infection.
- Store clippers in a dry case. Humidity dulls edges and breeds microbes.
- Replace clippers every 12–18 months. Even stainless steel loses its edge over time.
🚨 Terrible Tip Alert!
“Use your teeth to tear off hangnails!” Nope. Not only does this damage enamel, but oral bacteria can infect the nail fold. Always use sterilized nippers.
Real-World Case Study: From Chronic Ingrowns to Salon-Ready Nails
Meet Lena, 34—a runner who suffered monthly ingrown toenails for years. She’d been cutting her toenails in deep curves to “match her toe shape,” creating pressure points that drove the nail edge into her skin.
We switched her routine:
- Stopped curving toenails; cut straight across
- Switched to professional-grade toenail clippers (Jouvé Precision)
- Applied tea tree oil post-trim for antimicrobial protection
Result? Zero ingrowns in 8 months. Her podiatrist confirmed complete resolution at her 6-month checkup.
FAQs About Proper Nail Trimming
How often should I trim my nails?
Fingernails grow ~3 mm/month; trim every 7–10 days. Toenails grow slower (~1 mm/month)—trim every 2–3 weeks.
Can improper trimming cause fungal infections?
Yes. Jagged edges or micro-cuts create openings for dermatophytes (fungi). The AAD notes that 50% of nail fungus cases begin with minor trauma from poor grooming.
Are electric nail files better than manual clippers?
For natural nails? No. Electric files remove too much material too quickly, thinning the nail plate. Reserve them for acrylic/gel removal under professional guidance.
Why do my nails split after trimming?
Likely culprits: dull clippers (crushing instead of cutting) or over-filing. Always use sharp tools and stop filing once edges feel smooth.
Conclusion
Proper nail trimming isn’t vanity—it’s preventive healthcare disguised as self-care. With the right tools, timing, and technique, you’ll avoid infections, strengthen your natural nails, and make every manicure last longer. Remember: great nails start long before the polish hits the bottle. They start with a clean, confident snip.
Now go clip like a pro—and may your edges stay forever splinter-free.
Snip with care,
Round the tips, leave corners square.
Healthy nails bloom.