Ever nicked your cuticle so deep you needed a band-aid just to wash dishes? Or worse—cut your nail so short it throbs like a tiny drumbeat every time you tap your phone? You’re not clumsy—you were just never taught the nail clipping technique that actually works. And honestly? Most “how-to” guides skip the part where human nails aren’t Lego bricks.
In this post, I’ll walk you through the dermatologist-backed, salon-tested, and personally battle-hardened nail clipping technique that prevents ingrown nails, hangnails, and those dreaded split ends on your fingernails. You’ll learn exactly how to hold clippers, when (and why!) to trim after a shower, what type of tool minimizes trauma, and even how to fix mistakes before they turn into infections.
Let’s get those nails neat—not nuked.
Table of Contents
- Why Nail Clipping Technique Matters More Than Your Clipper Brand
- Step-by-Step Nail Clipping Technique (Fingernails & Toenails)
- 7 Pro Tips for Flawless, Pain-Free Trims
- Real-World Case Studies: From Ingrown Disaster to Salon-Smooth
- FAQs About Nail Clipping Technique
Key Takeaways
- Trimming nails straight across—especially toenails—is critical to prevent ingrown nails (American Academy of Dermatology).
- The best time to clip? After a warm shower or soak—nails are 20–30% more pliable and less likely to splinter.
- Using dull or poorly designed clippers increases micro-tears that lead to peeling and infection.
- Fingernails should follow the natural curve; toenails should be cut straight with slightly rounded corners.
- Never rip hangnails—always snip them at the base with clean cuticle nippers.
Why Nail Clipping Technique Matters More Than Your Clipper Brand
Here’s a confession: I once used cheap drugstore nail clippers on a client during my early nail tech days. Two days later, she came back with a red, swollen toe—an early-stage ingrown nail. I felt sick. Turns out, it wasn’t just the tool—it was how I used it. I’d curved the cut to match her toe shape (like I did with fingers), and boom: pressure points formed under the skin.
Nail injuries from poor trimming are shockingly common. According to the Journal of the American Podiatric Medical Association, improper toenail trimming is the leading cause of ingrown toenails, which affect over 20% of the population at some point. And fingernail trauma? It’s why so many people suffer from chronic splitting, ridges, and peeling—even with moisturizer.
Your technique shapes your nail health long after the clippers go back in the drawer.
Step-by-Step Nail Clipping Technique (Fingernails & Toenails)
Optimist You: *“Just snip and go!”*
Grumpy You: *“Ugh, fine—but only if coffee’s involved.”*
Look, proper trimming takes 90 seconds. Do it right, and your nails stay strong for weeks. Here’s the gold-standard method I’ve used in salons and at home for over a decade:
Step 1: Soften First
Clip after a warm shower or soak your hands/feet for 3–5 minutes. Hydrated nails shear cleanly instead of cracking. Think of dry spaghetti vs. cooked—it’s the same principle.
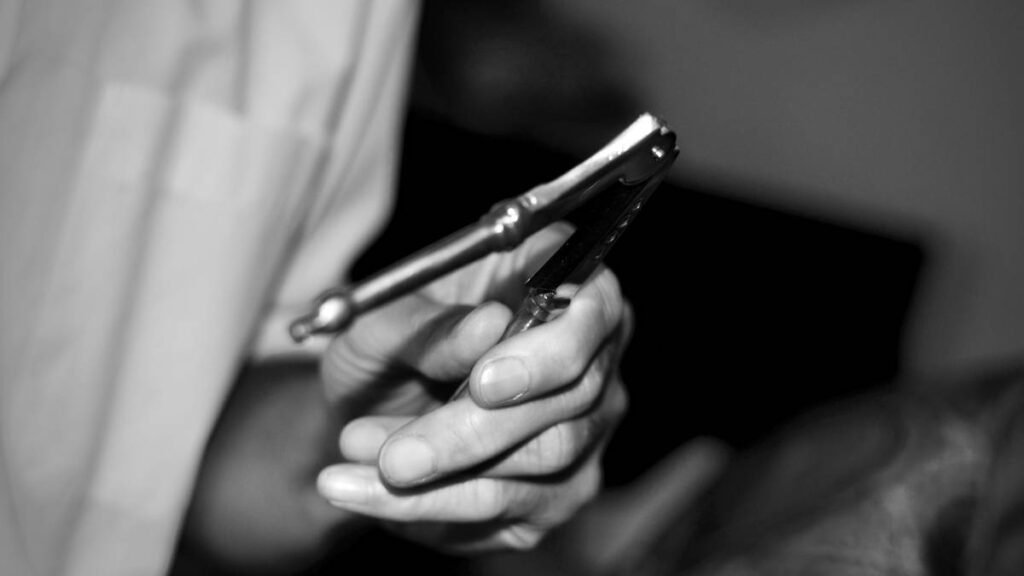
Step 2: Choose Your Weapon Wisely
Use stainless steel clippers with sharp, precision-ground blades. For fingernails, go with a smaller, curved-edge clipper. For toenails, use a larger, straight-edge nipper (like Tweezerman Deluxe Toenail Clipper). Dull tools crush instead of cut—creating weak spots.
Step 3: Fingernails = Gentle Curve
Hold the clipper perpendicular to the nail. Make small, deliberate cuts following your nail’s natural arc. Never cut too short—leave 1–2mm of white edge to protect the sensitive nail bed.
Step 4: Toenails = Straight Across
This is non-negotiable. Cut straight, then use a fine file to gently round the corners. No aggressive curves! This prevents lateral pressure that drives the nail into the skin.
Step 5: Clean Up with a File
Always smooth edges with a 180-grit glass or crystal file—never metal. Metal files can snag and tear nail fibers, causing splits later.
7 Pro Tips for Flawless, Pain-Free Trims
- Sanitize your clippers with 70% isopropyl alcohol before and after use. Bacteria love damp tools.
- Don’t share clippers—even with your partner. Fungal infections spread easily.
- Replace clippers every 12–18 months. Blades dull faster than you think.
- Trim weekly for fingernails, every 2–3 weeks for toenails. Consistency beats marathon sessions.
- Never peel or bite hangnails. Snip cleanly with a cuticle nipper angled downward.
- Watch your grip: Squeeze smoothly—no jerking. Use your dominant hand for control.
- If you bleed, don’t panic: Apply gentle pressure with a clean gauze pad and dab with antiseptic. Cover with a breathable bandage for 24 hours.
🚫 Terrible Tip Alert:
“Cut nails super short to make them grow faster.” FALSE. Nail growth happens at the matrix (under the cuticle), not the tip. Over-trimming exposes the nail bed to irritants and slows recovery. It also hurts. A lot.
Real-World Case Studies: From Ingrown Disaster to Salon-Smooth
Case 1 – Sarah, 34, Teacher
Sarah came to me with chronic ingrown toenails from years of cutting her nails in rounded crescents (thanks, Pinterest tutorials). After switching to a straight-across technique and using a quality toenail clipper, her ingrowns resolved in 6 weeks—and haven’t returned in 18 months.
Case 2 – Marcus, 28, Gym Enthusiast
Marcus had splitting fingernails from aggressive clipping post-workout (when nails are brittle from sweat evaporation). We shifted his routine to post-shower trimming with small, precise cuts. Within a month, his nails stopped peeling mid-week.
These aren’t flukes—they’re proof that technique trumps trend.
FAQs About Nail Clipping Technique
How often should I clip my nails?
Fingernails grow ~3mm per month—trim weekly. Toenails grow slower (~1mm/month)—every 2–3 weeks is ideal.
Can improper clipping cause fungal infections?
Indirectly, yes. Micro-tears from jagged cuts or hangnail ripping create entry points for fungi. Always trim cleanly and sanitize tools.
Should I clip or file more?
Clip to length, file to finish. Never rely solely on filing to shorten nails—it wears down layers unevenly and thins the nail plate.
What’s the difference between nail clippers and nippers?
Clippers are for general trimming; nippers (like cuticle nippers) have finer tips for precision work like hangnails. Don’t use cuticle nippers on full nails—they can crack them.
My nail lifted after clipping—what happened?
You likely cut too aggressively near the sidewall or used dull tools that tore instead of cut. Keep nails slightly longer and upgrade your clippers.
Conclusion
The perfect nail clipping technique isn’t about fancy tools or TikTok hacks—it’s about respecting the biology of your nails. Trim straight for toes, gentle curves for fingers, always soften first, and never underestimate the power of a sharp, clean clipper. Do this, and you’ll avoid pain, prevent infections, and keep your nails looking polished—even without polish.
Now go forth and clip with confidence. And if you hear that satisfying *snick-snick* sound? That’s the sound of healthy nails saying thank you.
Like a Tamagotchi, your nails need daily care—but only two minutes of focused attention per week to stay happy.
Nail Haiku:
Warm water softens,
Steel meets keratin with grace—
No more toe tears now.