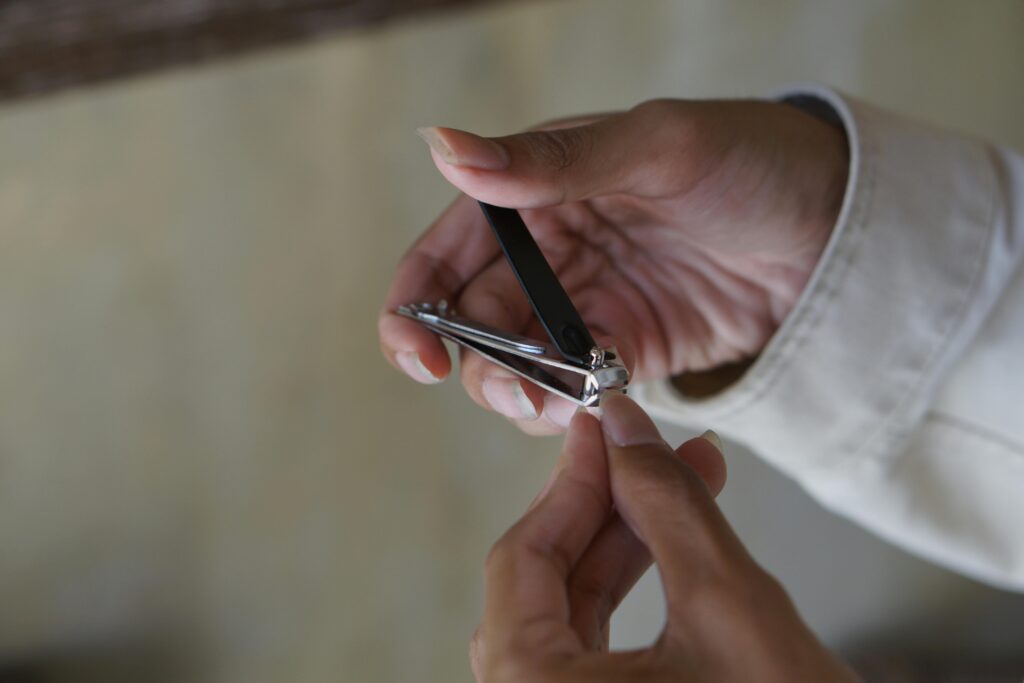
“Ever found yourself mid-mani when suddenly your nail clipper jams? Yeah, us too.” A dull blade can turn what should be a quick grooming session into an hour-long headache. Whether you’re a casual user or a pro creating intricate nail art, Clipper care is more than just keeping them clean—it’s about making sure they last for years while delivering precise cuts every time.
In this guide, we’ll dive deep into everything you need to know to keep your clippers in top shape. From troubleshooting common issues to mastering proper cleaning techniques, by the end of this post, you’ll have all the tools (pun intended) to extend the life of your favorite nail tool. Here’s what we’ll cover:
Table of Contents
- Key Takeaways
- Why Clipper Care Matters
- Step-by-Step Guide to Cleaning Your Clippers
- Best Practices for Maintaining Nail Clippers
- Success Stories: When Good Clippers Go Far
- FAQs About Clipper Care
Key Takeaways
- Properly maintained clippers not only perform better but also protect your nails from damage.
- Regular cleaning prevents rust, corrosion, and bacteria buildup on your tools.
- Invest in quality clippers—they’re worth it if cared for properly!
- Learn how often (and when not) to oil your nail clippers.
- Avoid common mistakes like using harsh chemicals that can degrade metal parts.
Why Clipper Care Matters
Let me tell you a horror story—one I still shudder at thinking about. Picture this: I’m prepping for a big client photoshoot as a nail artist. With minutes to spare, I pull out my go-to clippers… only to discover they’re completely unusable because I hadn’t cleaned them after months of neglect. They were coated in gunk, stuck shut, and smelled like regret. This incident taught me one hard lesson: poor Clipper care isn’t just inconvenient; it can cost you business opportunities—or confidence during DIY moments.
Think about it—dirty clippers don’t just ruin manicures; they harbor germs and lead to infections. Plus, dull blades snag instead of snip, causing painful tears in your nails. So, let’s break down why investing five minutes a week in clipper care will pay off big time.
Step-by-Step Guide to Cleaning Your Clippers
Cleaning your clippers doesn’t require fancy equipment—but it does demand consistency. Follow these steps:
Step 1: Disassemble the Clipper
First things first, take apart your clippers. Most models come with removable screws allowing access to inner components. If yours aren’t designed to disassemble easily, focus solely on external surfaces.
Step 2: Soak & Scrub
Use warm water mixed with mild dish soap to gently scrub away debris. An old toothbrush works wonders here, especially around hinge areas where grime builds up. Avoid soaking metal pieces entirely unless explicitly recommended by the manufacturer.
Step 3: Dry Thoroughly
“Optimist You:* ‘Quick drying is fine!’
Grumpy You:* ‘Nuh-uh, moisture breeds rust.'” Patience is key. Let air dry completely before reassembling. For extra protection, use a soft cloth to wipe down metal surfaces.
Step 4: Apply Lubricant (Optional)
Some swear by applying mineral oil to moving parts monthly, while others skip this step altogether. Experiment cautiously—you want smooth operation without risking gummed-up mechanisms.
Best Practices for Maintaining Nail Clippers
- Store Separately: Keep clippers in a dedicated case or pouch. Tossing them loosely in drawers exposes them to scratches and contamination.
- Replace Regularly: Even with excellent care, clippers wear out. Replace annually or sooner if performance declines.
- Skip Harsh Chemicals: Avoid bleach or acetone-based cleaners—they eat away at protective coatings over time.
- Dull Blades? Sharpen Sparingly: Professional sharpening services exist, but DIY attempts often worsen the problem. Proceed with caution.
Success Stories: When Good Clippers Go Far
Meet Alex, a self-proclaimed “clipper connoisseur” who swears by her decade-old pair. She attributes their longevity to religious weekly cleanings and occasional lubrication. “It’s chef’s kiss—the same precision now as day one,” she says. Meanwhile, Sarah learned the hard way after cheap clippers destroyed multiple manicures. Upgrading to high-quality titanium blades paired with diligent Clipper care has transformed her routine.
These stories highlight two extremes: proactive maintenance vs. reactive replacement. Choose wisely.
FAQs About Clipper Care
How often should I clean my nail clippers?
Ideally, after each use. But once weekly minimum ensures hygiene and functionality.
Can I sterilize clippers at home?
You can dip tips briefly in rubbing alcohol, but avoid boiling or autoclaving non-stainless steel varieties.
What makes nail clippers rust-proof?
High-grade stainless steel resists rust naturally. Still, consistently drying post-cleaning helps immensely.
Conclusion
Maintaining your nail clippers might seem minor compared to other beauty rituals, yet its impact is undeniable. Proper Clipper care means healthier nails, smoother trims, and peace of mind knowing your tools are always ready. Remember our mantra: small efforts yield massive rewards.
Like a Tamagotchi, your nail clippers crave daily TLC—even if it feels tedious sometimes. But trust me, future-you will thank present-you the next time those clippers glide effortlessly through even the toughest acrylics.
Steel bites through keratin,
Sharp edges dance, nails whisper,
Care keeps both strong.
P.S. Just like Ross yelling “PIVOT!” during heavy lifting, remember: patience pays off when caring for your clippers.